LV-1000 / LV-4000 / SensorVUE Touch User Guide
Overview
LoadVUE software can read between one and four force sensors, depending on the version purchased. (LV-1000 - single sensor, LV-4000 - four sensors)
SensorVUE software can read other types of sensors. In addition to force sensors, it can read torque, displacement, level, pressure and temperature sensors. An unlimited number of sensors can be read and their data can be logged. An unlimited number of graphs can be plotted simultaneously limited only by the computer speed and available memory.
In almost all other respects, LoadVUE and SensorVUE software are functionally identical. The screenshots are captured from SensorVUE but apply to LoadVUE versions as well. LoadVUE and SensorVUE are used interchangeably in this document. Any difference is noted in the relevant section.
Some of the functionality may be limited by particular type of license purchased. For example, uploading data to the cloud may need to be licensed separately.
Installation
Insert the CD-Rom into drive. The installation should start automatically. If not, browse to the CD-Rom folder and run Setup.exe to run the installation. The drivers needed to recognize the devices will also be installed automatically.
Startup and Sensor Selection
Click on the SensorVUE shortcut icon on your desktop to to start the program. The software will scan all the serial ports, detect all the Loadstar Sensors devices attached to your computer and display them in appropriate categories.

Select one or more sensors to be read and then click to proceed to the main screen of SensorVUE. (You can also uncheck the sensors that you do not want to read and then click .)
In LV-1000 you will be able to select only one sensor and in LV-4000, 4 sensors.
Window Layouts
SensorVUE main screen is shown next. By default the sensor readout windows (text windows) and the graph window will be shown. Depending on the number of sensors peak/low values may be hidden. Log window will also be hidden in the default view.

Use the following toolbar buttons to control, save and restore the windows that are of interest to you.

|
You can rearrange all the windows (text, plots, log) anyway you like and then click the button. The layout will be saved and restored when you restart the application. To delete this layout and restore the default layout simply click the button. |

|
Click on this button to show the text windows only. By default all text windows will be shown. You can minimize windows that are not of interest and then click button to save the layout. Whenever you click the button again, this layout will be restored. |

|
Click on this button to show the log window only. You can resize the log window and then click button to save the layout. Whenever you click the button again, this layout will be restored. |

|
Click on this button to show the plot windows only. By default all plot windows will be shown. You can rearrange the plots and minimize plots that are not of interest and then click button to save the layout. Whenever you click the button again, this layout will be restored. |

|
Click on this button to delete all saved layouts and restore the default layout. The default layout will depend on the number of sensors. Curren |
Reading the Sensors (Operation)

|
After all the settings have been configured, just click on the main toolbar to start reading the sensors (and log and plot the readings if selected.). See various sections below for instructions on logging, adding plots, alarms etc. |

|
Click to stop reading. |

|
Click to zero the sensors. |

|
When you click all existing data in the graphs will be cleared. If you want the graphs to retain the previous data, click the button and the graphs will continue to be plotted without clearing stale data. However depending upon when you clicked the button, there may be a small or large gap in the time axis. |

|
Click on the button in the tool bar to zoom in on a graph. Using the mouse draw a window on the graph and the contents of this window will be zoomed in while preserving the aspect ratio. Right click anywhere on the graph to zoom out. |
Resetting Peak/Low Values

|
Peak and Low values, when displayed, can be reset at anytime during operation by click on the button. (Peaks and Lows are also reset when the button is clicked). |
Logging Data
Data from one or more sensors can be saved to an Excel compatible log file. In addition, sensors can be combined to create a virtual 'formula sensor' and data from this sensor can be logged. Any number of formula sensors can be created. See 'Formula Sensors' section below.
Click on the toolbar button to show the log window.

- Check the and option type or select a file to log. Note if you select an existing file, its contents it will be overwritten.
- Select the log interval (for example, log every 1 sec, every 10 seconds etc). To record all the data read from the sensors (at a high rate) select the log interval as 'Maximum'. If some sensors are slower than others, you may get repeated readings for these sensors. For very small log intervals, <= 1 sec, the actual interval the logging takes place may not be exactly the specified interval. For example, if you are specified 0.25 sec (250 milliseconds) as the log interval, the actual interval may be between 240 to 260 milliseconds. This is especially true if your system is not equipped with a multi-core processor, if you are logging a lot of sensors, if you have setup alarms, monitoring relays etc.
-
Click on to show the log options window

-
In the Log Options... window click , then select one or more sensors. An user defined field can also be logged. Peaks and Lows, and Totals where applicable (for ex, multiple
force sensors) can be logged as well.

- Check the field . This will open a File Open dialog box where you can enter a file name. If the file already exists it will be overwritten. To log to a different file, click on .
- If you are logging continuously for a long period (hours), select . Logging to file will proceed but the data will not be shown in the log table on the screen. When logging at 'Maximum' speeds, logging to screen is automatically turned off. However, for improved performance, you should always choose this option if you do not need to see the values on the screen (and are only post-processing the data).
- You can add your own field to the log window. (Currently this field will not be uploaded to the cloud). For example, you are testing the damping characteristics of different materials and want to capture all the data in a single log file, you can type 'Material' in the and add this field to the log. (See above) Then just type the material name, for example, rubber, felt, foam etc in the user defined field in the log window. Any text entered in this field will be logged along with the sensor readings.
- If you are graphing the data while being logged, and also logging for an extended period (hours or days), select .If you log every 10 seconds for example, only the 10 second interval readings will be graphed (by default all the sensor readings are graphed).
- If you have selected the Log On Demand option, data will be logged only when you click the button in the log window
- Check the field to upload log data to the cloud.
Uploading Log Data to SensorVUE Cloud
Data logged to the local file can also be optionally uploaded to SensorVUE Cloud.
Note: Data must be logged to a local file before it can be uploaded.
You can create a SensorVUE Cloud account by going to this URL - SensorVUE Cloud. Register for an account after providing your email, company name, phone number etc. After creating an account on the website, you need to provide the credentials to the desktop software so data can be uploaded to your account. You can do this by selecting 'Cloud...Credentials for Cloud Account' from the menu. Enter your credentials in the window shown. Then click OK and the credentials will be verified.
 Once you have setup a cloud account and your credentials have been verified, in the log window you can turn on/off uploading to the cloud using the option.
To identify the files that have been uploaded to the cloud, you will be asked to enter description each time you click the toolbar button - this will start a new upload session.

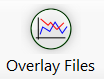
Reloading Logged Data (Overlaying Files)
|
Log data files can be read by the program and the data can be re-plotted. Multiple log files can be read and plots overlaid on top of one another. Click on button on the toolbar to open the 'Overlay Files' window. Then simply select one or more log files to overlay them. If you edit the log file any way, the software may not be able to read them. |
Plotting Data
Any number of graphs can be displayed in SensorVUE, depending on the memory available and processor speed. Graphs can be configured by selecting menu item. Graphs can have a Y1 and Y2 axes with multiple series on each axis. The x-axis can display either time or one of the connected sensors.
By default a graph with time on the x-axis and the first sensor on the y-axis is created. Edit these options as desired and then add more graphs by clicking the button. Delete a graph by clicking the button.
In the General Options area enter a title for the graph. You can also choose whether to show the legends and the grids.

In the X-Axis options area, select either scrolling time axis with a specified time range, for example, 10 sec. Only the latest 10 seconds of data are retained in the graph. If you want retain all the data then select the option. If you log for an extended period and use the option, heavy demand is placed on the processors and memory and this may have an adverse effect on data acquisition. To limit this by default after 250000 points (per graph) plotting will stop. You can increase or decrease this value here by editing the field.
You can also select the X-Axis to be non-time - for example, a Force-Displacement graph. In this case you will choose the displacement sensor as the x-axis sensor and the force sensor as the Y1 axis sensor. If you select this option, X-axis can be autoscaled as well as a minimum and maximum can be specified.

In the Y1 axis screen, select one or more sensors that you want to be graphed. If you want to graph 2 sensor readings and want to scale them differently, choose one to be on the Y1 axis and the other to be on the Y2 axis. For each sensor, you can customize colors, line thickness, marker type and marker sizes. The Y1 axis can be autoscaled or a minimum and maximum can be specified.

Configuration of the Y2 axis is similar to the Y1 axis.
You can click on the button in the tool bar to zoom in on a graph. Using the mouse draw a window on the graph and the contents of this window will be zoomed in while preserving the aspect ratio. Right click anywhere on the graph to zoom out.
You can print a graph by right clicking on the graph and selecting Print. You can also right click and "copy" the graph and paste it into Microsoft Word, Excel, Paint etc and process it further.
Formula Sensors
You can combine one or more sensors to create a virtual sensor. Simple formulas (using the 4 basic operations: + - * / ) can be used to create a virtual sensor. For example if you are using a force sensor and know the area under the force, you can plot the stress by creating a formula Force/Area. You can then log or plot these virtual sensors just as you would a real sensor. You can also combine formula sensors to create a new formula sensor. You can even use them to control relays.
Click on to create a virtual sensor. The Formula Sensors window is displayed.

Each real sensor or an already existing formula sensor is given a symbol. For example in the figure above the force sensor is called S0, and the peak value sensor is called S1. If you know the area under the force you can create virtual stress sensors. For example, if the area A=8.5 you can create virtual stress sensors like so:
- A 'stress sensor' can be created by entering the formula S0/8.5 in the formula field.
- A 'peak stress sensor' can be created by entering the formula S1/8.5
Once a formula sensor is created or deleted, you have to restart the program for the settings to take effect.
Note: Creating a formula sensor will have an impact on the speed of data acquisition, plotting etc, since the formula is parsed and evaluated at run time for each reading of the sensor. You should post-process the data if this becomes an issue.
Alarms
You can use the software's alarm feature to set alarms if a sensor reading goes above or below certain values. Multiple alarms can be active for different sensors (but the alarm sound is common.) In addition to audio alarms, you can also let the software send you an email or SMS text message if the readings exceed specified limits. Click on to configure the alarms.

General Options

Click on the button in the tool bar show the General Options window.

The following options are available:
- - Select number of decimals (0 to 3) to be displayed in the sensor readout text windows. For example, 1, 1.2, 1.23 or 1.234
- - The sensors are factory calibrated to a specific unit system depending upon several factors, model, type, capacity etc. For example, force sensors may be calibrated in kilograms (kgf) or pounds (lbf). But you may wish to display the results in Newtons. Use this field to set the desired units. The selected units will be applied to text, log and graph windows. The alarms will also be considered to be set in this units only.
- - See Logging Data section in this manual.
- - See Plotting Data section in this manual.
-
The sensor readout windows can be configured to use different background and foreground colors. You can use this feature to individually identify each sensor easily when looking at the display for a distance.

LoadVUE Versions Feature Comparison
| Feature | LV-100 | LV-400 | LV-1000 LV-1000HS |
LV-1000HS-1K | LV-4000 LV-4000HS |
SensorVUE | ControlVUE | LV-1000HS-10K |
| Supported Sensors | Force (Weight) | Force (Weight) | Force (Weight) | Force (Weight) | Force (Weight) | Force (Weight) Torque Pressure Level Displacement Temperature Acceleration Angle |
Force (Weight) Torque Pressure Level Displacement Temperature Acceleration Angle |
Impact Force |
| No. of Sensors | 1 | 4 | 1 | 1 | 4 | Limited by USB Ports Only | Limited by USB Ports Only | 1 |
| Log Readings to .CSV File | ||||||||
| Plot Readings | ||||||||
| Change Units | ||||||||
| Display Peak/Low Values | N/A | |||||||
| E-Mail/SMS/Audible Alerts |
(total only) |
(individual & total) |
(individual & total) |
|||||
| Secondary Axis Plots | N/A | |||||||
| Non-Time Axis Plots (eg. Force vs. Displacement) |
N/A | |||||||
| Zoom into graphs | ||||||||
| Overlay graphs from multiple runs | ||||||||
| Max Data Rate Supported (Readings/sec) |
150 | 150 | 150 (LV-1000) 500 (LV-1000HS) |
Above 1500 | 150 (LV-4000) 500 (LV-4000HS) |
1000 | 1000 | Upto 50 KHz |
| Log/Plot Derived Values (eg. Stress from Force and Area, Strain from Force and Displacement) |
||||||||
| Control Relays | (1, 2 and 8 channel versions available) |
|||||||
| Control Motors |